通过 frp 穿透内网访问树莓派的 aria2
几年前就已经搭建了基于树莓派 2B+ 的下载机,不过由于宽带没有外网 IP ,一直没有实现外网的访问和控制。最近花了几天空闲时间,搭建好基于 frp 的内网穿透服务。这里把搭建过程记录下来,与大家交流。
. 准备
1.1 硬件
- Raspberry Pi: 尽量用 2B+ 或者 3B+ 等性能较好的版本
- 树莓派上挂载了一块 1T 的移动硬盘,挂载点
/data
- 树莓派上挂载了一块 1T 的移动硬盘,挂载点
- VPS: 我用的是 IonSwitch (refer link)
1.2 系统和相关软件
1.3 域名
域名是为了内网穿透访问树莓派的需要。
- 如果是独立域名,直接在已有域名下添加 CNAME 域名。
- 如果是动态域名,根据需要设置。
这里的使用两个域名,web.mydomain.net 和 aria2.mydomain.net,分别对应 Web 访问和 aria2 rpc 访问。
2. 在树莓派上安装 aria2
2.1 从 Debian 源安装
# 从 Debian 源安装
sudo apt-get update
sudo apt-get install aria2
目前 Debian Stable 里面的 aria2 版本是 1.30.0;而最新版是 1.34.0,需要自己编译。
2.2 从源代码编译安装
首先下载最新的 aria2 源代码。
# 源代码编译安装
# 安装需要的库
sudo apt-get -y install libxml2-dev libcppunit-dev autoconf automake autotools-dev autopoint libtool
# 下载最新版源代码,当前是 1.34.0
wget https://github.com/aria2/aria2/releases/download/release-1.34.0/aria2-1.34.0.tar.gz
tar zxvf aria2-1.34.0.tar.gz
cd aria2-1.34.0/
autoconf -i
./configure
make
mv src/aria2c ~/bin  # 移动 aria2c 到 $HOME/bin/ 目录下
- 更详细的编译安装选项请查看 aria2 文档。
2.3 编辑 aria2.conf 文件
mkdir $HOME/.aria2
cd $HOME/.aria2
vim aria2.conf
下面是 aria2.conf 文件。
- 注意,
rpc-secret=需要设置一个比较长而且复杂的 token 字符串,保证安全。 bt-tracker=的 BT tracker 列表可以使用 https://github.com/ngosang/trackerslist ,每日更新
# Basic Options

# Download directory
dir=/data/Downloads

# Downloads the URIs listed in FILE
input-file=/data/aria2/aria2.session

# Log file
log=/data/aria2/aria2.log

# Maximum mumber of parallel downloads
# Default 2
max-concurrent-downloads=10

# Continue downloading a partially downloaded file
continue=true

# HTTP/FTP/SFTP Options

# Set the connect timeout in seconds to establish connection to
# HTTP/FTP/proxy server
# default 60
connect-timeout=60

# Close connection if download speed is lower than or equal to
# this value(bytes per sec)
lowest-speed-limit=0

# The maximum number of connections to one server for each download
max-connection-per-server=5

# Set number of tries
max-tries=5

min-split-size=20M

# Download a file using N connections.
split=5

# Set timeout in seconds
# Default 60
timeout=30

# BitTorrent Specific Options

# Enable Local Peer Discovery. If a private flag is set in a torrent,
# aria2 doesn't use this feature for that download even if true is given.
bt-enable-lpd=true

# If true is given, after hash check using --check-integrity option and
# file is complete, continue to seed file.
bt-hash-check-seed=true

# Specify maximum number of files to open in multi-file
# BitTorrent/Metalink download globally.
bt-max-open-files=100

# Specify the maximum number of peers per torrent. 0 means unlimited.
bt-max-peers=55

# Download meta data only.
# The file(s) described in meta data will not be downloaded.
bt-metadata-only=false

# Set minimum level of encryption method.
# If several encryption methods are provided by a peer, aria2 chooses
# the lowest one which satisfies the given level.
bt-min-crypto-level=plain

# Removes the unselected files when download is completed in BitTorrent.
bt-remove-unselected-file=false

# If true is given, aria2 doesn't accept and establish connection with
# legacy BitTorrent handshake(\19BitTorrent protocol).
# Thus aria2 always uses Obfuscation handshake
bt-require-crypto=true

# If the whole download speed of every torrent is lower than SPEED,
# aria2 temporarily increases the number of peers to try for more
# download speed.
bt-request-peer-speed-limit=50K

# Save meta data as ".torrent" file.
bt-save-metadata=false

# Seed previously downloaded files without verifying piece hashes
bt-seed-unverified=false

# Stop BitTorrent download if download speed is 0 in consecutive SEC
# seconds
bt-stop-timeout=0

# Comma separated list of additional BitTorrent tracker's announce URI.
bt-tracker=<BT tracker list>

# Set the connect timeout in seconds to establish connection to tracker.
bt-tracker-connect-timeout=60

# Change the IPv4 DHT routing table file to PATH.
# Default: $HOME/.aria2/dht.dat
dht-file-path=/data/aria2/dht.dat

# Change the IPv6 DHT routing table file to PATH.
# Default: $HOME/.aria2/dht6.dat
#dht-file-path6=<PATH>
dht-file-path6=/data/aria2/dht6.dat

# Enable IPv4 DHT functionality
enable-dht=true

# Enable IPv6 DHT functionality
enable-dht6=true

# Enable Peer Exchange extension
enable-peer-exchange=true

# If true or mem is specified, when a file whose suffix is .torrent or
# content type is application/x-bittorrent is downloaded, aria2 parses
# it as a torrent file and downloads files mentioned in it.
# If mem is specified, a torrent file is not written to the disk,
# but is just kept in memory.
# If false is specified, the .torrent file is downloaded to the disk,
# but is not parsed as a torrent and its contents are not downloaded.
follow-torrent=true

# Set TCP port number for BitTorrent downloads.
listen-port=6881-6999

# Set max overall upload speed in bytes/sec.
# 0 means unrestricted.
max-overall-upload-limit=0

# Set max upload speed per each torrent in bytes/sec.
# 0 means unrestricted.
max-upload-limit=0

# Specify share ratio.
# Seed completed torrents until share ratio reaches RATIO.
seed-ratio=1.0

# Specify seeding time in minutes
seed-time=120

# RPC Options

# Enable JSON-RPC/XML-RPC server.
# It is strongly recommended to set secret authorization token
# using --rpc-secret option.
enable-rpc=true

# Add Access-Control-Allow-Origin header field with value * to
# the RPC response.
rpc-allow-origin-all=true

# Listen incoming JSON-RPC/XML-RPC requests on all network interfaces
rpc-listen-all=true

# Specify a port number for JSON-RPC/XML-RPC server to listen to
# Possible port 1024 - 65535
# rpc 默认端口是 6800,可以自行修改
rpc-listen-port=6800

# Set RPC secret authorization token.
rpc-secret=your-rpc-token

# Advanced Options

# Restart download from scratch if the corresponding control file
# doesn't exist
allow-overwrite=false

# If false is given, aria2 aborts download when a piece length is
# different from one in a control file.
# If true is given, you can proceed but some download progress
# will be lost.
allow-piece-length-change=false

# Always resume download.
always-resume=true

# Rename file name if the same file already exists
# This option works only in HTTP(S)/FTP download
auto-file-renaming=true

# Save a control file(*.aria2) every SEC seconds
# Default 60
auto-save-interval=300

# Download file only when the local file is older than remote file.
# This function only works with HTTP(S) downloads only.
conditional-get=false

# Change the configuration file path to PATH
conf-path=/home/pi/.aria2/aria2.conf

# Set log level to output to console.
# LEVEL is either debug, info, notice, warn or error
console-log-level=warn

# Run as daemon.
# The current working directory will be changed to / and standard input,
# standard output and standard error will be redirected to /dev/null
daemon=true

# If true is given, aria2 does not read all URIs and options from file
# specified by --input-file option at startup, but it reads one by one
# when it needs later. This may reduce memory usage if input file
# contains a lot of URIs to download.
# If false is given, aria2 reads all URIs and options at startup.
# Default: false
deferred-input=false

# Disable IPv6.
# This is useful if you have to use broken DNS and want to avoid
# terribly slow AAAA record lookup.
# Default: false
disable-ipv6=false

# Enable disk cache.
# If SIZE is 0, the disk cache is disabled.
# This feature caches the downloaded data in memory, which grows to
# at most SIZE bytes. The cache storage is created for aria2 instance
# and shared by all downloads.
disk-cache=32M

# This option changes the way Download Results is formatted.
download-result=default

# Set DSCP value in outgoing IP packets of BitTorrent traffic for QoS.
# This parameter sets only DSCP bits in TOS field of IP packets, not
# the whole field.
#dscp=

# Enable color output for a terminal.
enable-color=true

# Map files into memory.
# This option may not work if the file space is not pre-allocated
enable-mmap=false

# Specify file allocation method
file-allocation=prealloc

# Save download with --save-session option even if the download is
# completed or removed.
# This option also saves control file in that situations.
# This may be useful to save BitTorrent seeding which is recognized
# as completed state
force-save=false

# If true is given, after hash check using --check-integrity option,
# abort download whether or not download is complete.
hash-check-only=false

# Print sizes and speed in human readable format (e.g., 1.2Ki, 3.4Mi)
# in the console readout.
human-readable=true

# Set maximum number of download result kept in memory.
# The download results are completed/error/removed downloads.
# The download results are stored in FIFO queue and it can store at most
# NUM download results.
# When queue is full and new download result is created, oldest download
# result is removed from the front of the queue and new one is pushed to
# the back.
# Setting big number in this option may result high memory consumption
# after thousands of downloads.
# Specifying 0 means no download result is kept.
# Default: 1000
max-download-result=200

# When used with --always-resume=false, aria2 downloads file from scratch
# when aria2 detects N number of URIs that does not support resume.
# If N is 0, aria2 downloads file from scratch when all given URIs do
# not support resume. See --always-resume option.
# Default: 0
max-resume-failure-tries=0

# Set log level to output.
# LEVEL is either debug, info, notice, warn or error.
# Default: debug
log-level=notice

# Set a piece length for HTTP/FTP downloads.
# This is the boundary when aria2 splits a file.
# All splits occur at multiple of this length.
# This option will be ignored in BitTorrent downloads.
# It will be also ignored if Metalink file contains piece hashes.
piece-length=1M

# Show console readout
show-console-readout=true

# Set interval in seconds to output download progress summary.
# Setting 0 suppresses the output.
# Default: 60
summary-interval=120

# Fetch URIs in the command-line sequentially and download each URI in
# a separate session, like the usual command-line download utilities.
force-sequential=false

# Set max overall download speed in bytes/sec.
# 0 means unrestricted. You can append K or M (1K = 1024, 1M = 1024K).
# To limit the download speed per download, use --max-download-limit
# option
max-overall-download-limit=0

# Set max download speed per each download in bytes/sec.
# 0 means unrestricted. You can append K or M (1K = 1024, 1M = 1024K).
# To limit the overall download speed, use --max-overall-download-limit
# option
max-download-limit=0

# Enable parameterized URI support.
parameterized-uri=true

# Validate chunk of data by calculating checksum while downloading
# a file if chunk checksums are provided.
# Default: true
realtime-chunk-checksum=true

# Save error/unfinished downloads to FILE on exit.
# save-session=/data/Downloads/aria2.session
save-session=/data/aria2/aria2.session

# Save error/unfinished downloads to a file specified by --save-session
# option every SEC seconds.
# If 0 is given, file will be saved only when aria2 exits.
save-session-interval=600

# Stop application after SEC seconds has passed.
# If 0 is given, this feature is disabled.
stop=0

# Truncate console readout to fit in a single line.
truncate-console-readout=true
2.4 启动 aria2 作为守护进程
# 首先创建 aria2 所需目录
mkdir /data/Downloads /data/aria2
# 启动 aria2
aria2c --conf-path ~/.aria2/aria2.conf -D
3. 在树莓派上安装 AriaNg,配置 Apache2 虚拟服务器
3.1 设置树莓派静态 IP 地址
- 也可以在路由器上通过 MAC 地址绑定的方法分配固定的 IP 地址。
- 建议通过有线网卡连接,要稳定不少。
编辑 /etc/dhcpcd.conf 来设置静态 IP 地址 129.168.1.100:
sudo vim /etc/dhcpd.conf
interface eth0  # 有线网卡 eth0,无线网卡是 wlan0
static ip_address=192.168.1.100/24  # 指定静态IP,/24表示子网掩码为 255.255.255.0
static routers=192.168.1.1  # 路由器/网关IP地址
static domain_name_servers=114.114.114.114  # 手动定义 DNS 服务器
然后重启树莓派,静态地址生效。
sudo reboot
启动后,监测 IP 是否生效:
ip addr
3.2 安装 AriaNg
- 从这里下载最新的 AraiNg。注意不要下载
AllInOne版本。 - 解压缩,并且移动到
/var/www/:
mkdir ariang
cd ariang
# 当前最新的是 1.0.0
wget https://github.com/mayswind/AriaNg/releases/download/1.0.0/AriaNg-1.0.0.zip
unzip AriaNg-1.0.0.zip
rm AriaNg-1.0.0.zip  # 删除安装包
cd ..
sudo mv ariang/ /var/www/  # 移动到 HTTP ROOT
sudo chown -R www-data:www-data /var/www/ariang  # 只能由 www-data 访问
3.3 配置虚拟服务器
cd /etc/apache2/sites-available
vim 001-ariang.conf
文件 001-ariang.conf 的内容:
Listen 80
<VirtualHost 192.168.1.100>
    ServerAdmin webmaster@localhost

    DocumentRoot /var/www/ariang
    ServerName web.mydomain.net
    ServerAlias aria2.mydomain.net

    ErrorLog ${APACHE_LOG_DIR}/error.log
    CustomLog ${APACHE_LOG_DIR}/access.log combined
</VirtualHost>
- 树莓派上 http 访问采用默认的 80 端口
- AriaNg 所在的目录作为 Http document root
重新启动 Apache2 服务:
sudo a2ensite 001-ariang.conf
sudo systemctl reload apache2
通过网络浏览器访问 http://192.168.1.100 ,应该就能够看到 AriaNg 的界面。
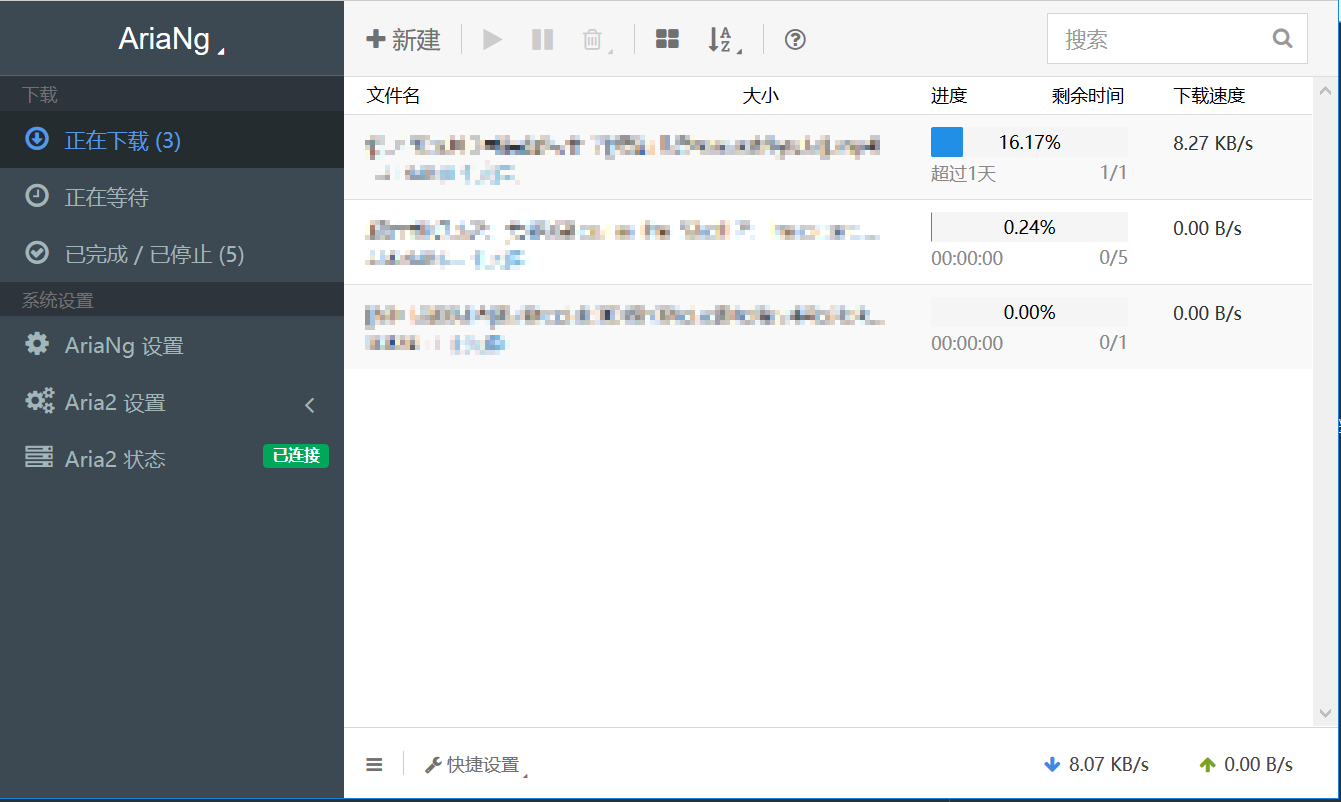
然后,在 AriaNg 设置 / RPC (192.168.1.100) 页面中,
- 修改 RPC 端口为 6800,
- 填写
Aria2 RPC 密钥/Aria2 RPC Secret Token(即your-rpc-token), 刷新后就可以连接上 aira2 服务。

4. 在树莓派上安装和配置 frpc 客户端
# 下载 frp,树莓派对应的是 arm 版
wget https://github.com/fatedier/frp/releases/download/v0.21.0/frp_0.21.0_linux_arm.tar.gz
tar zxvf frp_0.21.0_linux_arm.tar.gz
# 在 $HOME 创建 `frpc/` 目录
mkdir ~/frpc
# 移动 frpc 相关程序到 ~/frpc/
cd frp_0.21.0_linux_arm/
mv frpc frpc.ini ~/frpc/

cd ~/frpc
编辑 frpc.ini:
- 同样需要设置一个较复杂的 token。
# frpc.ini
[common]
server_addr = VPS IP 地址或域名
server_port = 7000  # frp 通讯端口,默认 7000
token = your-frp-token

log_file = frpc.log
log_level = info
log_max_days = 3

tcp_mux = true

login_fail_exit = true

protocol = tcp

pool_count = 5

[web]
type = http
local_ip = 192.168.1.100
local_port = 80
use_encryption = true
use_compression = true
custom_domains = web.mydomain.net

[aria2]
type = http
local_ip = 192.168.1.100
local_port = 6800
use_encryption = true
use_compression = true
custom_domains = aria2.mydomain.net
通过 screen 运行 frpc:
./ftpc -c frpc.ini
5. 在 VPS 安装和配置 frps 服务端
# 下载 frp,VPS 一般用 x64 版
wget https://github.com/fatedier/frp/releases/download/v0.21.0/frp_0.21.0_linux_amd64.tar.gz
tar frp_0.21.0_linux_amd64.tar.gz
# 在 $HOME 创建 `frps/` 目录
mkdir ~/frps
# 移动 frps 及相关文件到 ~/frps/
cd frp_0.21.0_linux_amd64/
mv frps frps.ini ~/frps

cd ~/frps
编辑 frps.ini:
[common]
bind_port = 7000

bind_udp_port = 7001
kcp_bind_port = 7000

vhost_http_port = 8080  # 映射树莓派的 80 端口到 VPS 的 8080 端口
                        # 避免占用 VPS 的默认 Web 端口

vhost_http_timeout = 60
vhost_http_timeout = 60

dashboard_addr = 0.0.0.0
dashboard_port = 7005             # frp 监控网页端口
dashboard_user = frp_admin        # 用户名自己修改
dashboard_pwd = dashboard-passwd  # 自己修改

log_file = frps.log

log_level = info

log_max_days = 3

token = frp-token  # 与 frpc.ini 中的一致

# 限制可用端口范围
allow_ports = 6000-9000

max_pool_count = 5
max_ports_per_client = 0

authentication_timeout = 300

tcp_mux = true

[http]
type = http
custom_domains = web.mydomain.net,aria2.mydomain.net
通过 screen 运行 frps:
./frps -c frps.ini
浏览器访问网址: http://web.mydomain.net:8080 就可以打开通过 VPS 穿透内网访问树莓派上的 AraiNg 网站。
然后,在 AriaNg 设置 / RPC (...) 页面里,
- 修改
Aria2 RPC 地址为aria2.mydomain.net - 端口
8080 - 以及填写
Aria2 RPC 密钥/Aria2 RPC Secret Token(即your-rpc-token)
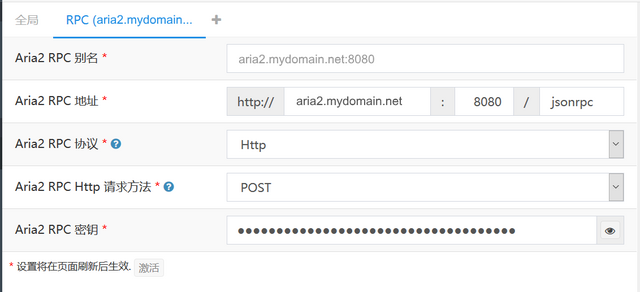
刷新后,就能够通过 VPS 穿透内网连接到树莓派上的 aria2。
从此就可以愉快地下载了 。
6. 监控 frp 的运行
访问 http://web.mydomain.net:7005 (7005 是 dashboard_port 端口),然后输入账号和密码:
